
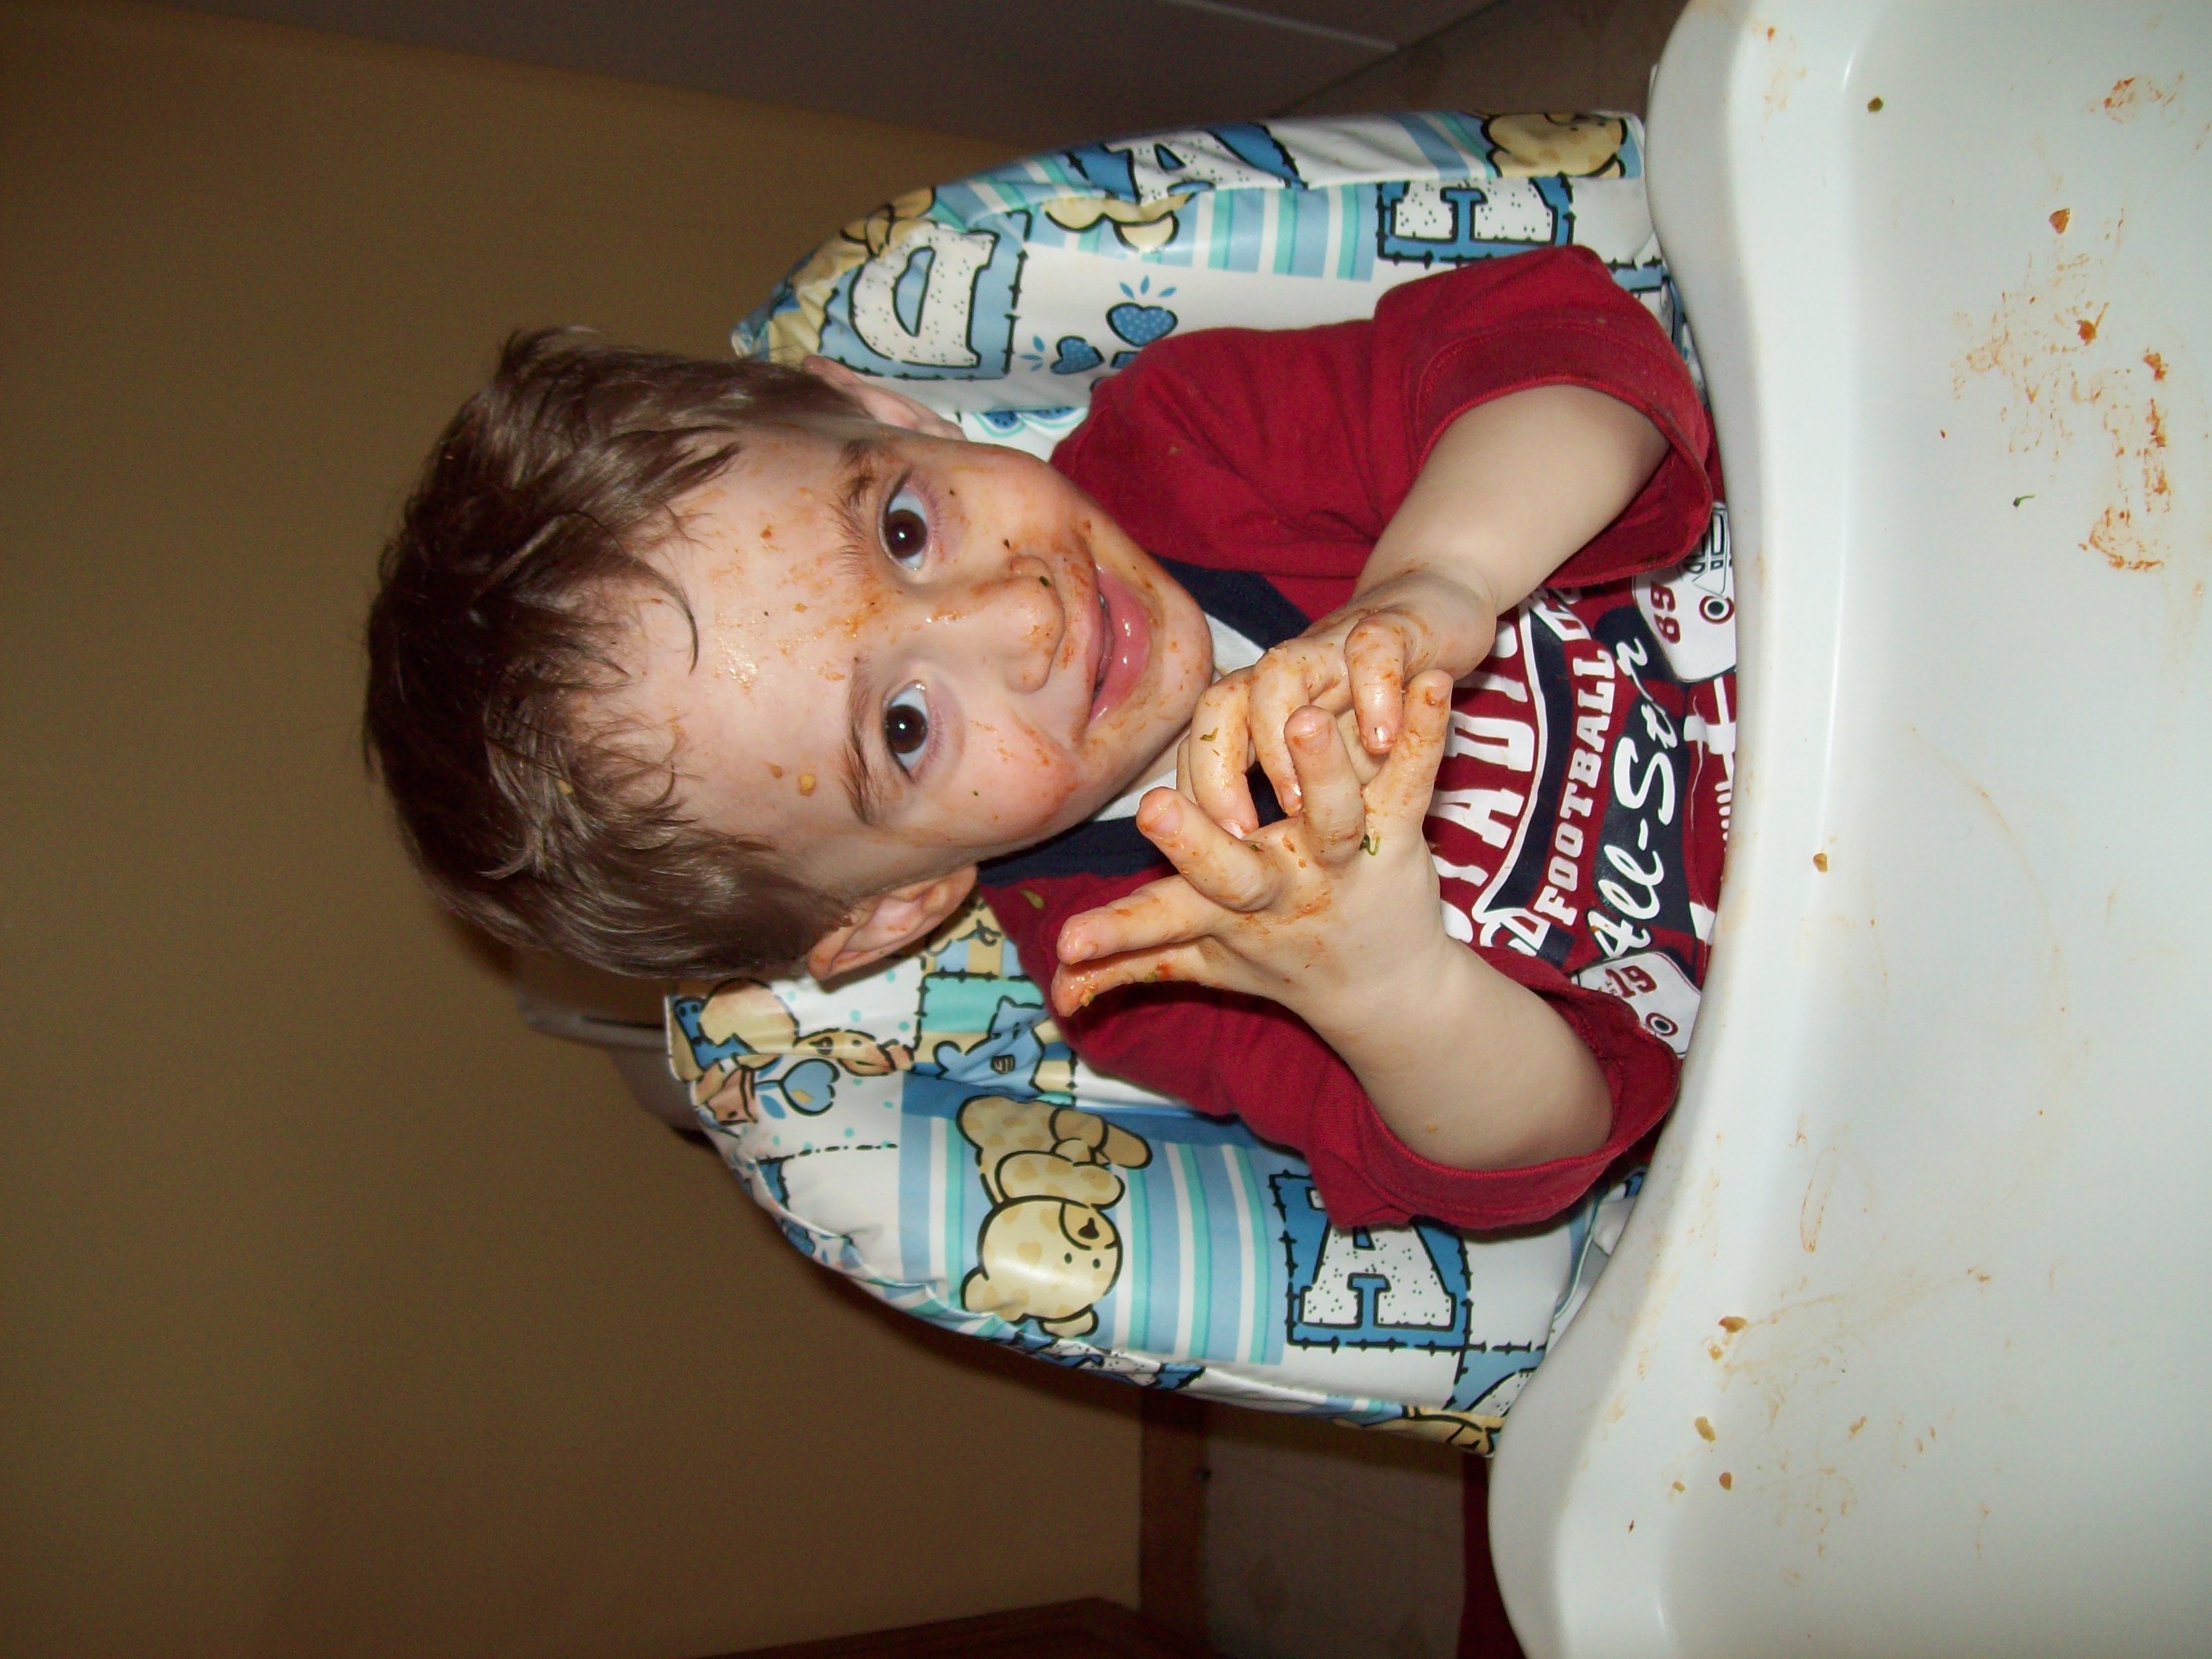
My oldest son after enjoying some pasta and sauce, his favorite meal when he was two. A rare moment of catching a smile and eye contact on camera!
Over time, little by little, we have slowly been transforming our entire lifestyle.
It started almost six years ago, when I first learned to become a label reader. I laugh now to think there was ever a time that I bought a product without first checking the label. Seriously, I find it hard to believe because I do it now instinctively. 1) Pick up a product in the store. 2) Read the label.
To test the theory that I at one time was NOT a label reader, I recently went and read some labels on some of the products I used to buy. The ingredients were shocking! And yes, that proved it to me that I never read a label before that day. (Although I could tell you the calories of every food I ever consumed, so I guess that means I at least looked at that calorie content portion of a nutritional label!)
What first lead me into the world of “label readers” was my son, who needed to start a gluten, dairy, and soy free diet. Unless you have been on an elimination diet like this, you have NO idea how many ingredients hide one of these three things! I brought with me a packet of papers with fine print in size 6 font with lists and lists of ingredients that contain gluten, and then I scoured every product in the store that I used to buy that contained those ingredients.
With time, my label reading evolved into looking for foods that were organic, or trying to avoid foods that contained things like carrageenan or citric acid. Then, three years ago when we began the GAPS Diet, I felt the weight of the world lifted off my shoulders as I no longer needed to label read. I bought whole ingredients in their natural form: you don’t need a nutritional label on an organic apple to tell you that it’s an apple and doesn’t contain grains or gluten. Sweet!
However, one big elephant in the room that I somehow managed to ignore was our personal care and cleaning products. Somehow I was so focused on GLUTEN and DAIRY that I completely forgot about CHEMICALS. While I checked the boys’ shampoo to make sure it didn’t contain gluten and was a “natural” product, I didn’t think to really check what went in to it. And neither my husband nor I were following a gluten-free lifestyle at that point, so what did I need to check our products for?
It wasn’t until we were a few months into GAPS and I reread Dr. Natasha’s book “Gut and Psychology Syndrome” that a lightbulb went on: while I detoxified our bodies with our diet and cleaned up the mess with food as I could, I was completely ignoring our environment. While I worked so hard to detoxify us, I was just continually adding to our toxic burden with the chemical storm I allowed in my home.
And so out went the nasty chemical cleaning products, and in came products like those from Seventh Generation or enzyme-based cleansers. The boys’ shampoo changed to Castile’s liquid soap; I tried several attempts to make my own for me without success (I have very fine textured hair, and everything made it too heavy and greasy) and ended up finding Carina Organics products, which I love. Little by little our environment cleaned up. I started adding in more houseplants to cleanse the air, airing the house out regularly (the neighbors must think I’m nuts to have my windows open when it’s below zero!), and using only products with names I can read and as few ingredients as possible.
Then, about a year and a half ago, I was introduced to the world of essential oils. (Where have you been all my life?!) As we used them to become healthier and stronger, I started to experiment further with making my own products: and thus emerged an entire line of DIY cleaning products. For pennies, I could make my own liquid hand soap and “Soft Scrub”. This week, I finished up my DIY collection with the two final things I was still buying from the store: dishwasher detergent (watch for the recipe to be posted soon!) and liquid dish soap.
Why did I decide to make these myself, when there are plenty of “natural” alternatives out there? Let’s discuss the liquid dish soap for a moment.
When I went looking for a healthy dish soap product, there are definitely plenty to choose from. There’s Seventh Generation, Mrs. Meyer’s, Earth Friendly Products, Ecover, and more. So what was the need to make my own?
I discovered in the process of using these products that when you dig deeper, they often contained ingredients I was trying to avoid. For example, several of these products contain sodium lauryl sulfate, which is a detergent and surfactant found in many personal care products. It is inexpensive and used for its cleaning and emulsifying properties. It is derived from coconuts, so it plays really well to the “natural” label. However, the problem with sodium lauryl sulfate is that the manufacturing process results in it being contaminated with 1,4 dioxane, which is a carcinogenic byproduct. SLS has been linked to irritation of the skin and eyes, organ toxicity, developmental and reproductive toxicity, neurotoxicity, endocrine disruption, and biochemical or cellular changes. There are nearly 16,000 studies in the PubMed science library about the toxicity of this chemical.
So, with all the difficulty I was having finding a truly “clean” product, I decided to start researching on how to make my own.
I came across this recipe by Heather, the Mommypotamus. It has been working very well for me and can be tweaked to meet your needs. Please visit her page for the original version of her recipe.
DIY Liquid Dish Soap
3 cups boiling water
1 grated soap bar (I used Oatmeal Spice soap which I purchased from Wildhaven Soap Company)
½ cup liquid Castile’s soap
3 tsp. super washing soda
1 tsp. non-GMO vegetable glycerin
20-40 drops of essential oils (I used 10-15 drops of Thieves essential oil)
- Boil your water. Then, over medium high heat, stir in your grated soap until dissolved.
- Remove from heat and pour into a glass container. (I used a quart-sized Mason jar). Add the Castile’s soap, super washing soda, and glycerine and stir to mix.
- Let the soap set for 24 hours, stirring occasionally. It will thicken over time. (If you want it to be thicker, warm it up again and dissolve ½ tsp. of super washing soda in it. Let it set again and repeat this process until desired thickness is reached). For me, my kitchen was quite cold when I made this for the first time, so I noticed that it actually got too thick. If this happens, add warm water and mix until liquid again. If the liquid soap is clumpy, you can blend it with an immersion blender or a regular blender.
- When the desired consistency is reached, stir in your essential oils and place the soap in a pump container. I found this pump and lid which fit a regular-mouth glass canning jar at Target.
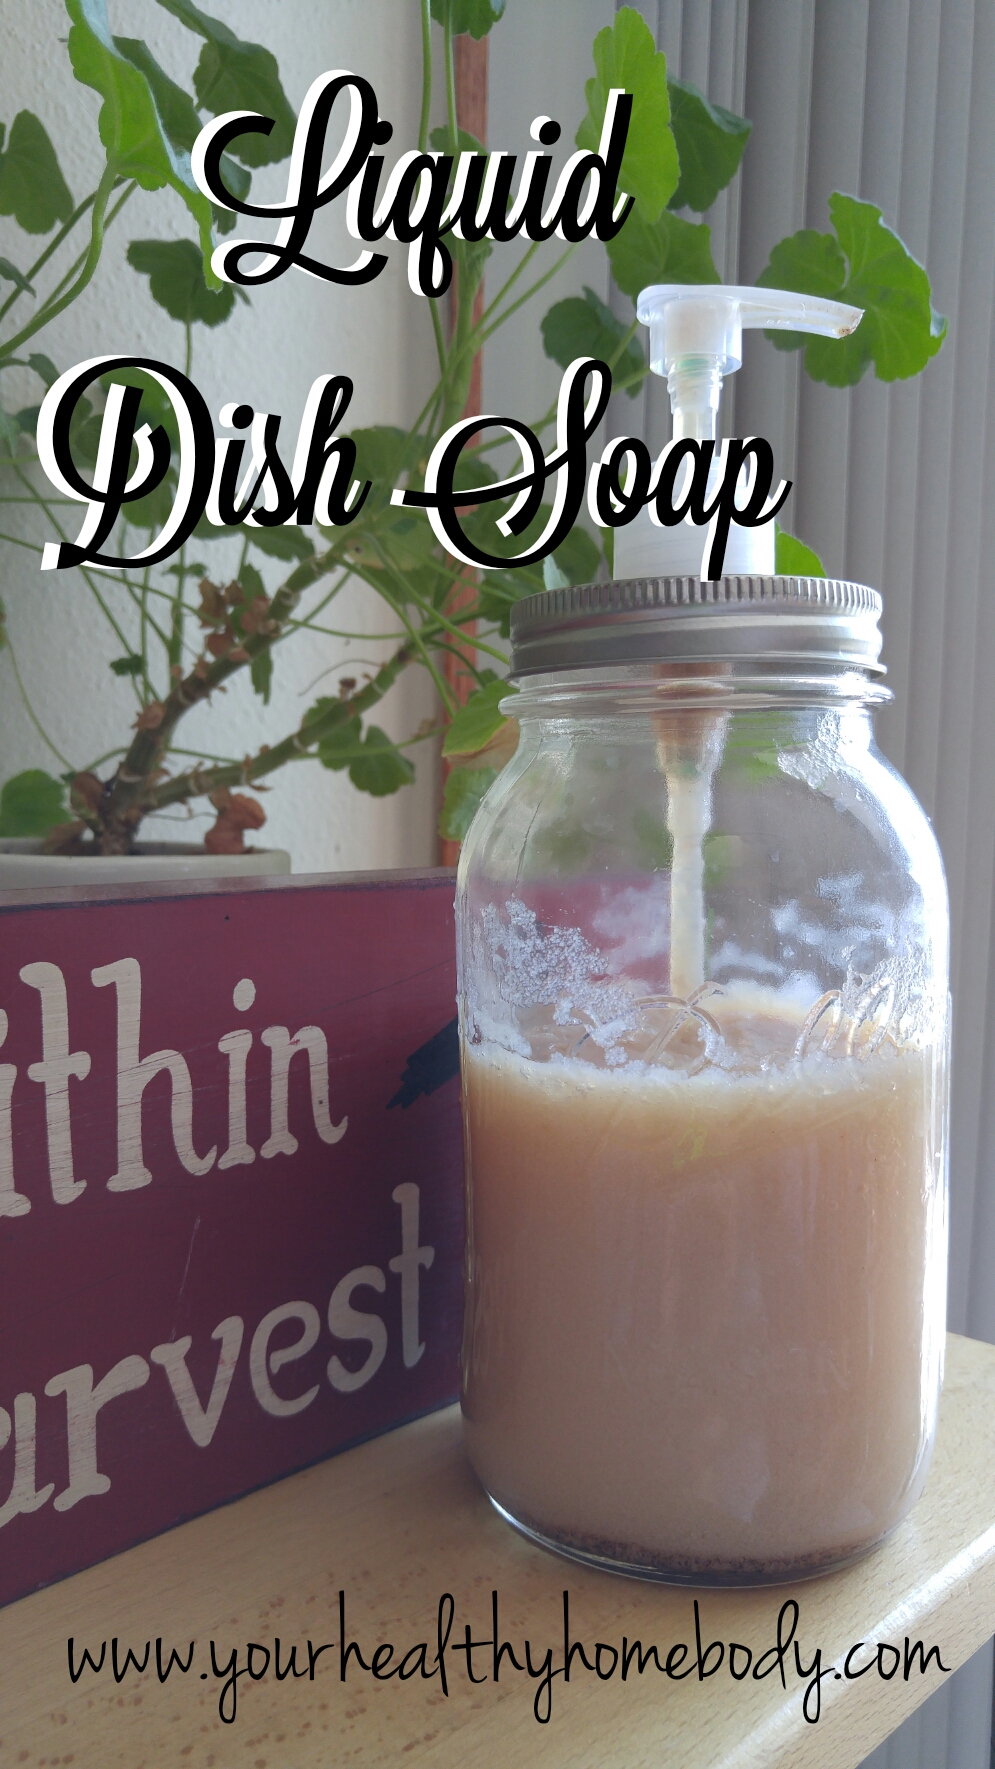
This soap works well for cleaning my dishes and has been gentle on my hands when I wash them in the kitchen. And I love the spicy, warm scent that it has! I would love to hear if you’ve made this soap and what essential oils you’ve used with what results. ❤
~ Alicia
